The Four-Hour Chair
As a society, we have convinced ourselves that we need to employ and pay experts to do everything. If we can’t pay, we do without. Planners will try to convince you to employ them to design your new kāinga. Architects will try to convince you to pay them to design your new home. And furniture stores will try to sell you chairs and sofas that won’t last.
Rather than talk about it, we came up with a hands-on empowerment workshop. Since hands-on building of a kāinga is a bit much for a beginner, we started with a workshop where participants build a chair. A 4-hour chair that is made by people who have never held a tool in their life. They would make it in two hours without a tape measure, just a saw and an electric screwdriver. And then make it beautiful in two more hours using a grinder and sander.
They discover their own capabilities and develop confidence to prepare them to plan their own kāinga. It is a useful training exercise for everyone and at the end, they get to take away a chair that cost about $12 and will last a lifetime.
The challenge in making a good chair comes in ensuring that
- all four legs solidly stand on the floor (no wobble)
- is comfortable, and
- won’t loosen or fall apart after years of daily use.
Much time spent in making a chair comes from precise measuring to assure the wood fits together – mastery of the tape measure for precise lengths and protractor for precise angles. This requires years of apprenticeship to get right. We began by tossing out the tape measure and protractor.
Begin with the cushion. It determines the size of the chair, and it is something you can pick up for free from a discarded worn out chair at the tip (but with good cushion) or a second-hand shop or garage sale. Make the seat frame to match the size of the cushion, except allowing cushion overlap at the front, perhaps three finger width overlap. The cushion determines the seat size, rather than take measurements.
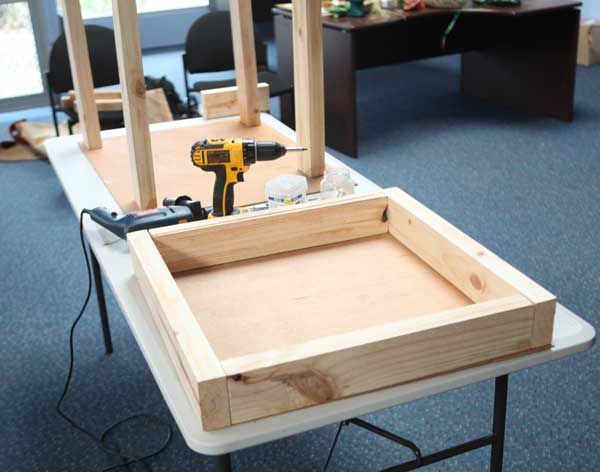
The seat frame is a simple rectangle, 100×50 screwed together with readily available, self-drilling, self-countersinking deck screws which, because of their design, hold firm after years of use. Affix a supporting top to the seat frame. The top can be thin plywood, leather, upholstery webbing or rope. No measuring – match the seat frame.
Place a flat piece of 19mm (¾”) plywood on which the four legs are screwed from the underneath. This assures all four chair legs are cut square and will sit solidly on the floor. Making a chair that does not wobble is hard, unless you do it this way because the legs begin perfectly level and flat.
After screwing down the first leg through the plywood, place the seat bottom on the plywood to identify where the other three legs should go.
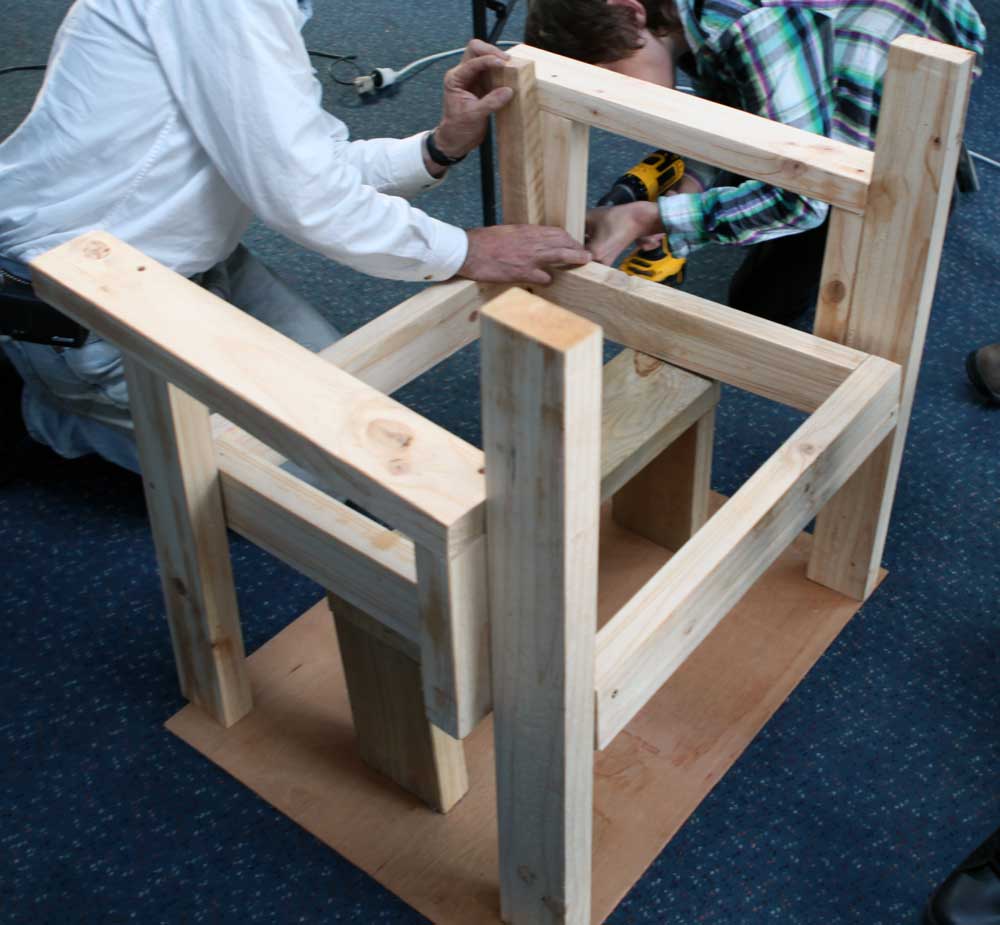
Now you have four legs temporarily screwed to the plywood base and a seat frame. Time to fit the frame at the right height and the right angle so it is most comfortable. Angle setting is very hard in traditional furniture making, resulting in too many chairs where the person says it is not right. We do it differently to make the angle right every time.
First you need to determine the right height of the front of the seat. For this you need something strong and stackable, like a set of big books or spare timber. Stack to what looks like a comfortable height, place the cushion on top and ask the volunteer to sit. If it needs to be higher or lower add or remove books or boards.
When you have the right front height, screw the seat frame front to the front chair legs with a single strong 100 mm screw through each leg so it locks in the seat base.
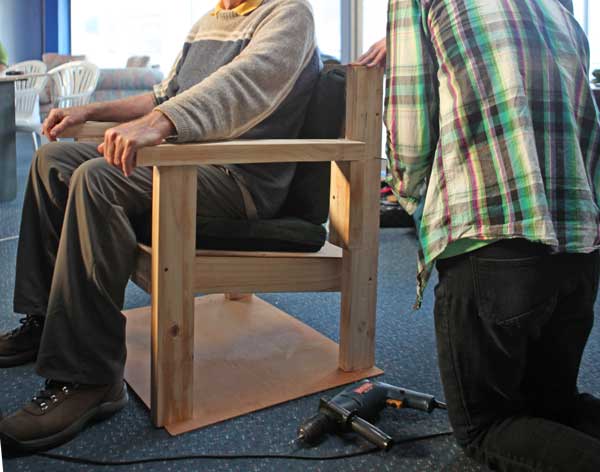
Then with one volunteer carefully sitting on the front-fixed cushioned seat, the other (strong) volunteer holds and lowers the rear part of the seat until the sitter says the angle feels right. Then screw in the rear screws, thus fixing the perfect angle. No geometry – fly by seat of your pants.
Note that if the volunteer says its too high or low, you just unscrew and change height. When done, add two more screws for safety into each of the legs.
The same process is repeated for the seat back and for setting the arm height to tailor the chair to the body. Fit to the body and dry it when it fits perfectly. Keep the plywood base for the next chair, which will be better.
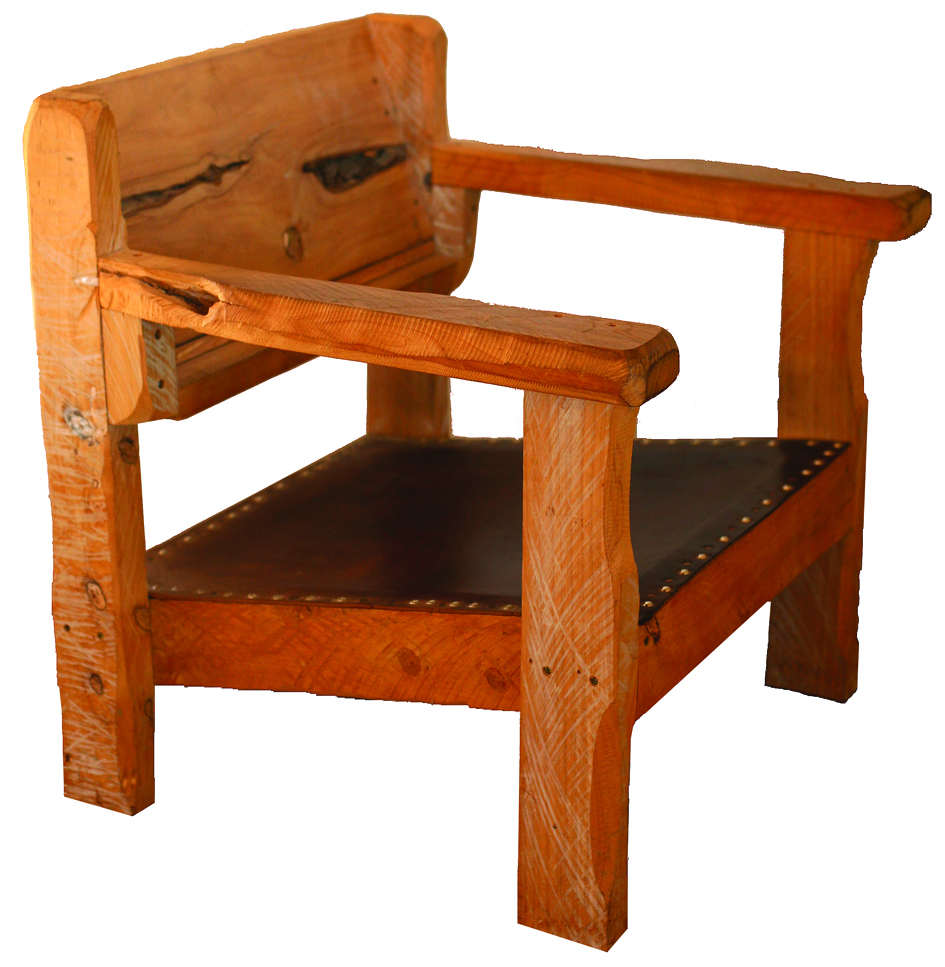
The first chair took two hours to assemble. When done, it was a perfectly comfortable, rather ugly and heavy chair made out of 50×100 timber. The remaining two hours were then spent with an angle grinder and sander cutting away over 50% of the timber, shaping the square angles into a unified sculpted piece of furniture. This is human-scaled design – faster, easier, better.
While we were showing home to make the first chair a member of the whanau came by to say they have tōtara timber they can harvest, which would make a much more attractive chair than scrap radiata pine from a building site.
While the first chair are made to furnish your own home, once artistry takes over, there will be a market to sell the chairs. $300 for a smooth finish, perhaps $1,000 or more for one with Kōwhaiwhai patterns. Instead of op-shop cushions, the weavers may start to make the fabric from wool, and before you know it, a new native industry is born.
![]() There is a business 101 lesson here. The 4 hour chair was made possible by a shift in technology, the lowly deck screw. A self-countersinking, self-drilling screw with a square head shape to make it harder to strip, it has a very sharp, narrow point, so drilling a pilot hole is unnecessary, especially in soft wood. Its unique shank design means it propels into place with shallower thread to spread out the force, so the screw takes less energy to put in, but is difficult to pull out or work loose over time. After 25 years, the chair is still solid, with no glue, only screws holding it together.
There is a business 101 lesson here. The 4 hour chair was made possible by a shift in technology, the lowly deck screw. A self-countersinking, self-drilling screw with a square head shape to make it harder to strip, it has a very sharp, narrow point, so drilling a pilot hole is unnecessary, especially in soft wood. Its unique shank design means it propels into place with shallower thread to spread out the force, so the screw takes less energy to put in, but is difficult to pull out or work loose over time. After 25 years, the chair is still solid, with no glue, only screws holding it together.
The next business lesson is organizing a disorganized business by cutting out the high-skill or time consuming labour component. The 4-hour chair eliminates skill of pre-cutting wood parts to match up. Grinding & sanding two pieces of wood already fastened to each other is faster. The best way to determine if an angle is comfortable is to sit on it.
Chair making has two tangible benefits for kāinga building.
- It gives people confidence that they can make something happen, even if they have never done it before. If you can do it with a chair, you can do it with a kāinga.
- It give you something to sit on.
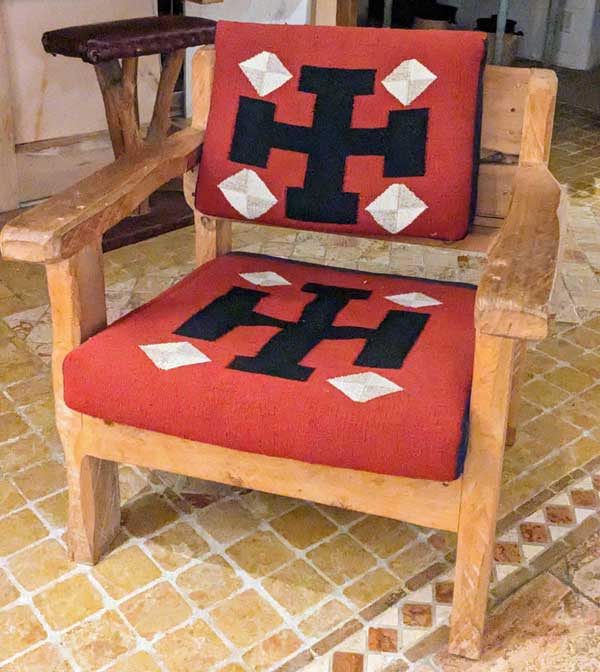
Below is a photo of the first chair we ever made… it’s now 25 years old. The cushions was made by Navajo weavers who were visited to explore if Māori weaving could be adopted from harakeke weaving of panels to wool weaving of fabrics.
Begin by making the seat bottom the same size (less overlap) of the cushion
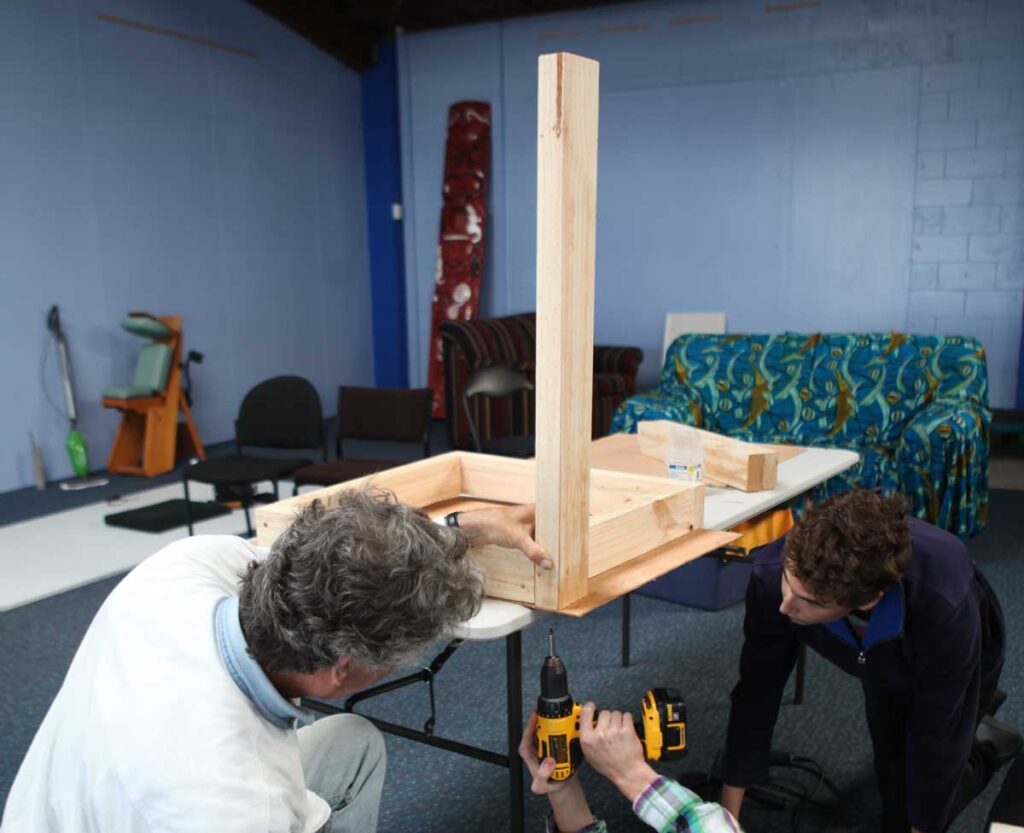
Set a flat piece of plywood on the table. Set the seat bottom as a guide on the plywood. Here the first leg is being screwed into the temporary plywood to hold it flat.
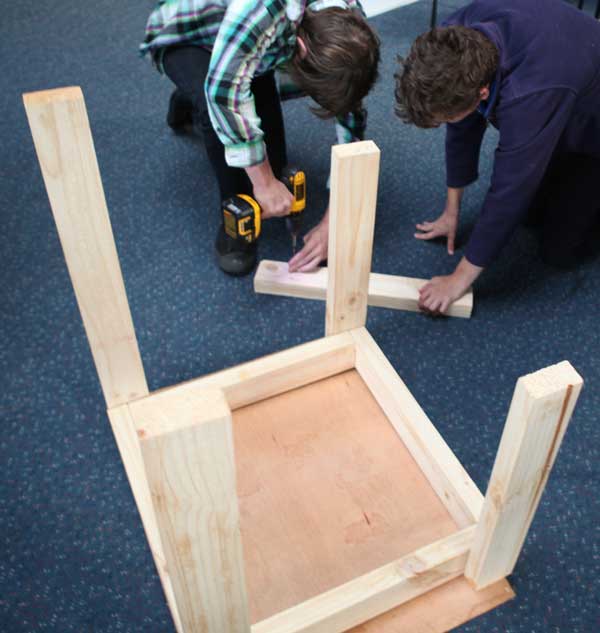
Then screw the other legs to the plywood just touching the seat bottom so they are in the right place. The legs will not wobble because at the bottom they sit flush.
Then remove the seat bottom and prepare it to fit in place as a seat. Forget measuring, have the person who will sit in the chair act as the model. Have them sit at a comfortable height (with the cushion on) with a stack of books or boards to get the right height.
Then put the arms on and put a single screw in the front of the seat. Have a strong person raise and lower the seat with the cushion on, with the other person sitting on it, pivoting on the screw until they say the angle feels comfortable. Then screw the rear screws in to set it. You now have a seat and arms.
Then do the same with the seat back – screw in the top and keep moving until the back angle feels good to the person sitting in the chair.
At this point you have the chair in about 2 hours. Then spend the next two hours with a wood grinder shaping it to take off the sharp 90° angles and make it look and feel nicer.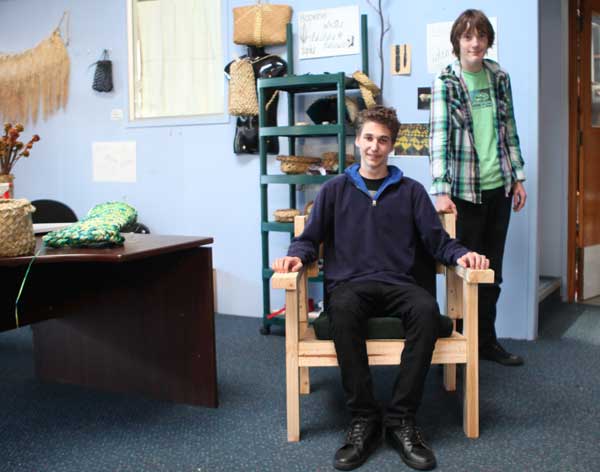
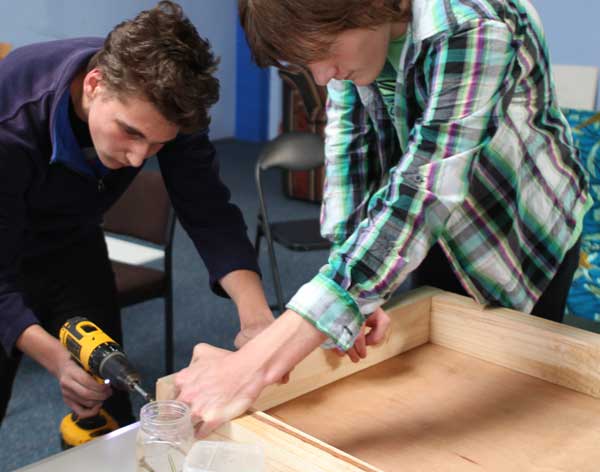
These two teens had never held a tool in their life. Yet they built the chair in two hours.
The first chair will always look a bit rough, but it will work, it will last and it will cost the price of a few screws plus free scrap timber from a construction site. The next one will be the same, except the finishing will look better. Soon creativity kicks in. Some will take a soldering iron and start decorating the chair with traditional Kōwhaiwhai patterns.